EAR Dac 4 - Firmware Upgrade
How to check if you need to update your firmware
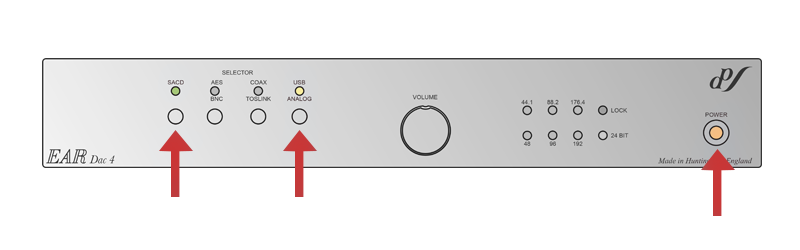
- Switch off your EAR Dac 4 and wait 10 seconds
- Hold both the SACD button and USB/Analog button together whist powering the Dac 4
- If you have correctly booted the Dac 4, the LEDs should toggle all LEDs
- Press 1 of the 4 input buttons, e.g. SACD
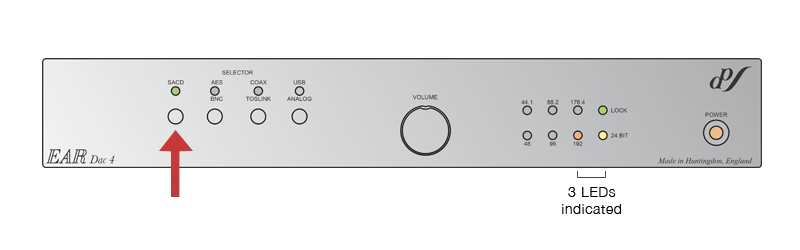
- You should now see a static display of LEDs indicated.
- If LED indicators "192", "24bit" and "lock" are ON, then you have an older firmware that may need updating. Contact us directly and we will be able to confirm if it needs to be updated.
Updating your firmware
- Switch Off and Unplug all connectors to the Dac 4.
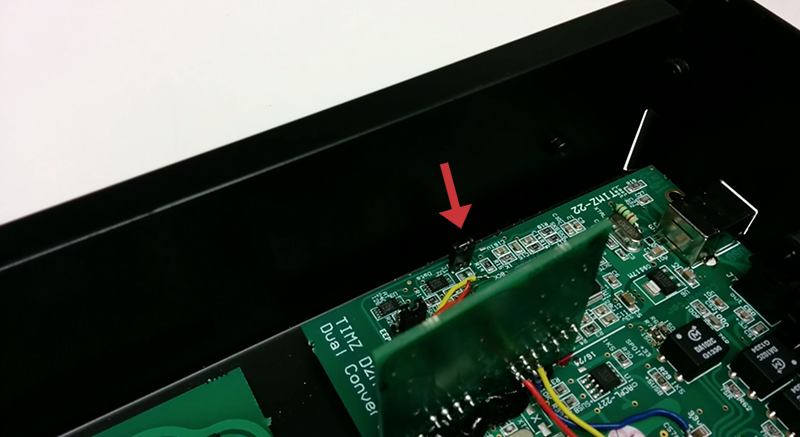
- Unscrew the top cover and remove it to the side.
- At the back of the product, there is a Digital board with a pair of jumpers, remove the jumpers.
- With your Windows PC, plug the USB cable to both the computer and the Dac 4.
- Replace the jumpers back onto the Dac 4 PCB.
- Download the firmware software at the bottom of the page.
- Run the file.
- Press the update firmware.
- If successful, replace and fasten the top cover back onto the Dac 4.
- Connect up the cables.
- Download & install the drivers for your computer.
Firmware Download
Firmware Date: 3/3/2014
 Windows 7, 8 & 8.1 Windows 7, 8 & 8.1 |
|---|
Note: This is for owners of the EAR Dac 4 purchased before March 2014, who need to update the firmware before use with latest drivers:
For users just needing the latest drivers please download from driver download selector.